Thursday, March 7, 2013

Next up: Eye Tilt

I was able to finish the head tilt design today.

It might be a little difficult to see but, trust me, it's there... Unfortunately, the actual rod and rod end is not there because I don't have any dimensions for one so I eyeballed it and gave me enough room to modify the parts a little bit in case they don't fit perfectly at first.

EDIT: Here's an image of the head tilt with *temporary* linkages connecting the servo and the ball and socket joints for your viewing pleasure.

This image shows the part moving in 3 dimensions. For example, if both servos rotated in sync and mirrored, it would tilt the head up or down. If one moved instead of the other or different amounts, it would start rotating and tilting at the same time. Of course in the final design, instead of the linkages, there will be a rod end and a threaded rod connecting the servo arm and the ball and socket joint on the bottom.

Next up is going to be the eye tilt. I still have a few more hours tonight to work on it so maybe I can get an proof of concept design in there somewhere. Once that's done, I'm thinking about putting a 3 axis accelerometer in both of his eyes so I can use a closed loop feedback for the head tilt as well as for his eye tilts. Three axis accelerometers (with breakout boards in place) are about $12 each but if I make them myself, I can get the IC for about $5-6. We'll see...

The one thing I'm having trouble with is finding the right size servos for his movements. I'm trying to find the most economical yet powerful servos, steppers, and motors but who knows what'll happen when it's time for the real thing!

Alright, like I said, it's time for the eye tilt tonight and then I'll get started with the neck tomorrow. It's going to be very interesting to see if I have enough room for what I want to do in there. Essentially, it's going to be like a robotic arm driven by several timing belts and pulleys. The thing I'm most worried is about vibrations and shaking of the head when WALL-E is moving and stopping. Rigidity is the key!

Wednesday, March 6, 2013

Not a very productive day today...

Unfortunately, I didn't get to everything I said that I would today but I did manage to start the head tilt design...

What you see are 2 ball and socket linkages for the head tilt and 1 inline ball and socket linkage for the third pivot as well as carrying the load of the head.

I had to do it this way because the real WALL-E only has a ball and socket joint. There are no actuators to move his head...

I tried to incorporate the idea of a swivel ball from yesterday but I couldn't find anything reasonable yet. There's not much room in the neck so I had to resort to using a low profile servo with about 7-9 kgcm stall torque; hopefully that will be enough.

So, tomorrow, I will work on the linkage and connection to the servo inside the head for the tilt. If I have time, I will work on the eye tilt as well.

Oh, and my glass lenses came today in the mail! 3 day shipping from NH.. that's pretty good! The lens was in fact 110mm instead of 4.25" but it doesn't matter too much. I added the lens and a temporary rim to see what it'd look like.


It's OK... I'll have to do further checks to see what the correct design is for the rim.

Alright, that's it for tonight. Good night!


Tuesday, March 5, 2013

Final Update of the Day

For today's final update, I have started the the base of the head and the neck attachment.


Please keep in mind that the very bottom piece (which is part of the neck) is only a placeholder part to see how the parts mated.  Unfortunately, I was unable to find the ball and socket joint similar to the real WALL-E. I've searched everywhere but in the end I had to resort to using an inline ball and socket linkage. I'll see if I can possible use a stainless steel spherical shell (tongue twister!) and cut the top and bottom off to create an outer boot to cover my linkage. That's definitely something we can do!

Here's another view of my work so far.


From this rendering, I still need to do the following:
- Eyebrows (I know I keep mentioning this...)
- Front element (glass lens)
- Front element rim
- Eye tilt mechanism
- Head tilt mechanism

I may have to deviate from the real WALL-E by making the neck attachment piece longer towards the rear of the pivot piece for me to install a stepper for the head rotation... We'll see...

Anyways, the plan going forward is...
March 6: Head tilt mechanism
March 7: Eye tilt mechanism

If I can finish those two items in the next two days, that'd be awesome!

I'm still working on the eye

I'm still trying to optimize the design of the eye socket right now...


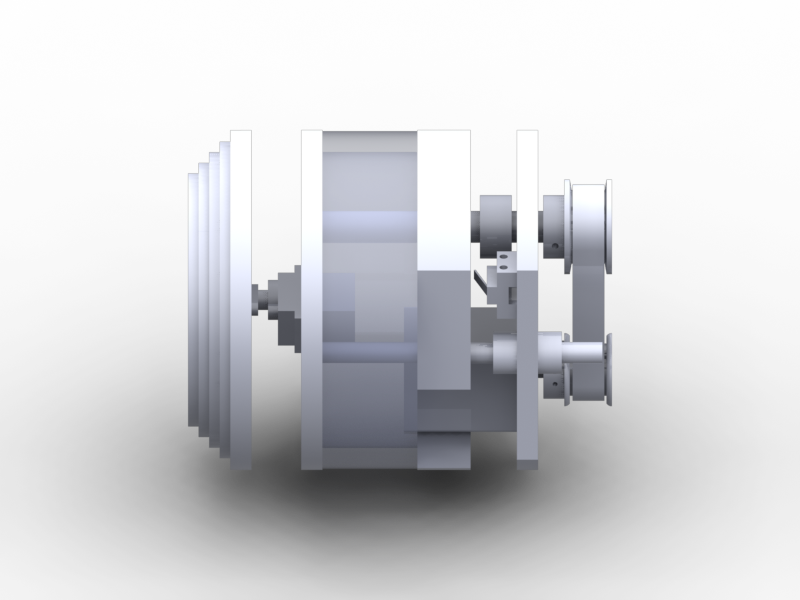
Mechanism-wise, it's finished. What I'm trying to do now is to remove some material from each piece to reduce the overall weight. Most of the weight is in that middle bracket which holds the ACME nut (and bushings) and the front lens frame. I'm more worried about the lens frame since a tiny servo will attempt to spin that. Most likely, it'll end up look like a wheel spoke so it shouldn't take too long.

Next up will be the eye tilt mechanism. Hopefully, I'll get to it tonight.

Oh, and my outer lens shipped and should be arriving tomorrow. The specs stated it was 4.25" or 110mm (which are different by the way) but it'll be interesting if they will fit into my design.

And finally, the eyebrow design is being put on hold.. mostly because I don't want to work on it right now.

Monday, March 4, 2013

Eye in/out movement complete!

Just finished the in/out movement mechanism for the eye!

Now it's time for some rest but next on the agenda is the eye tilt mechanism followed by the head tilt mechanism. Hopefully, I will have enough room to put those in... eeek.

Sunday, March 3, 2013

Final update of the day

So I said that I would finish the eyebrow design but unfortunately, I didn't get to it today. I did, however, finish the inner cutout to give clearance for the pivot.

The main thing that I got started today was redesigning the in/out movement of the eyes. I originally had a gearmotor directly driving a leadscrew via a coupler (which I could not find) but decided to change it to a stepper. The stepper would be offset and would drive the leadscrew via timing belts. This should make it slightly more compact and would eliminate the need for a second limit switch since I would have more control with the stepper motor.

Originally I had trouble finding an MXL/XL pulley for a 3mm motor shaft and a 3/8 leadscrew so by changing to a stepper motor, I'll be using a XL timing belt with a 5mm motor shaft and 3/8 leadscrew from sdp-si.com. The mounts for the stepper would be slotted to allow me to tension the belt without the need for a idle pulley (hopefully).

Alright, time for sleep!

Almost done with the shell

I tried to line up a picture with what I had and it's pretty close.


I still have to work on the cutout on the inside of the eyes to have clearance for the pivot piece. Then I'll work on the eyebrow design by add the decorations. That'll probably be it for today.

Tomorrow, I'll work on the eye tilt mechanism and rebuild WALL-E's head for optimization. Once that's done, I'll be able to start on his head tilt mechanism and the base of the head.

I ordered 2 glass lenses for WALL-E's outer element and once they get here, I'll get started on that. I wasn't sure how large they were (the person said 110mm or 4.25" which are two different values but we'll see what I get). I'll be able to add the element and the rim to WALL-E's eyes so it'll a little better.

Hmm, what else? Here's what I had in mind as for the future designing schedule (in this order):
- Neck
- Body (including his Igloo lunch box)
- Arms
- Legs

In other news, I'm getting ready to purchase the parts for my Shapeoko. Like I mentioned earlier, I'll be upgrading to a larger cutting area so I just want to make sure all the additional parts will be compatible with what I'm trying to do before spending all this money!

Alright, time to head out today!

Saturday, March 2, 2013

Starting to look like something, eh?


Well, sort of.. Like I said earlier, the most important part of WALL-E is his head. The shape, the look, and the feel of it has to be spot on or else it'll look awkward...

Now it's time for some sleep!

Quick Update

Here's a quick update. I eyeballed where the pivot would go and render my progress so far.


Time for a break!

Edit: Accomplished a little bit more!


I still need to add the rear connector, side cutout for the pivot, links from the eye to the pivot, and pivot mechanism.

Friday, March 1, 2013

Eye Pivot

I had a chance to get pretty far on the rear of WALL-E's head but then I realized that I made it mirrored and unfortunately unrecoverable. Because of that, I decided to start on his pivot in between his eyes...

There are several designs out there and I decided to model what I thought most resembled the original WALL-E but made slight modifications to make it easier to fabricate.

After reviewing some stills from the movie, I reduced the width of WALL-E's eyebrows by 0.5" and set them back 0.5".

It is time for me to sleep now but I'll finish this rod tomorrow with the supports and hopefully I'll get a chance to re-start the rear section of his head.